Showing posts with label washes. Show all posts

Monday, February 25, 2019

Touching cloth: sculpting folds of fabric in greenstuff 

Hello there! I’ve been sculpting a hell of a lot of cloth for my necromunda gangs lately and received quite a few messages asking how I go about ... touching cloth.


So here we go!
Tool list:
•Two bits of clear plastic (the plastic from the clam shell packages are ideal.)
•Petrolium jelly. Any Vaseline will do. I’m using sculpting Vaseline.
•Greenstuff. You can give it a go with miliput but I’ve not tried it. And greenstuff is pliable.
•Sculpting tools.
•Razor blades.


Right let’s do this.
First you want to cut your plastic into two sheets

Rub a little Vaseline onto each to stop the greenstuff sticking
Place your green stuff between and squish and move the plastic until you have the right thickness for what your wanting. A firm even pressure for best results. It’s really easy to stick the greenstuff to the plastic. But this system is so quick if you mess up it’s easy to try again.


Now cut away the excess until you have your base cloth. Using your sculpting tools pick it up to avoid fingerprints and push it into place. Don’t rush this step. Greenstuff has a long drying time so you have lots of time to work it into the right shape.


I use a rubber sculpting tool to push it into position, I start by getting the corners and pushing them into voids in the model with a cocktail stick, under shoulder pads or hip pads are best. Then using a small rubber sculpting tool manipulate it into shape, if you don't have one of these get a cheap pencil with a rubber on the end and shave it into a chisel shape. boom cut price sculpting tool. Don't use dental tools for this step. although you may feel you have more control with them you will end up squashing it into shapes with hard edges. The rubber tools are the way to go. Now leave to dry and presto, loin cloths, cloaks, and drying human skins for days!

Image result for rubber sculpting tools


Greenstuff sculpting is still quite a new area for me too so this is very much my own uninformed opinion. Good luck. And happy painting.
Henry


Wednesday, December 5, 2018

Van Saar: The dust gate orb weavers Finished!

After a bloody age of these guys sitting on my desk I've only gone and finished them! And I'm really happy with how they came out.


As it's been 7 months since I did the concept for them I'll recap whats been done.

Each one has padding sculpted between the hips, neck, ankles and shoulders to make them stand a couple of mm taller and adjust the poses significantly. Cloaks were greenstuff rolled out between two pieces of plastic coated with a little olive oil then sculpted into position.

I've kept the metals NMM so as to get the contrast I wanted and keep the colour pallete manageable.
The colours I settled on are a bit of a classic as the models were quite busy I didn't want to make it jarring. So turquoise and orange over muted bases are always a good bet.

Enjoy the photodump!

and happy painting! See you next week for my Delaque plans!


Monday, April 27, 2015

Salute, Robots and Raffles last day!


I've lit the fuse on my Stompy War Bastards army! Sent into pacify a planet before a hive tower was built the army will be pulling itself out of the rad-wastes in the underhive! Cannot get enough of these models. And I have a lot more sitting on my desk begging for a lick of paint. Going with black, dirty white, bronze, and gold for these. Red cracked and sandy bases with bright blue OSL which should hurt the eyes if I get the contrast just so.

Salute was awesome! And as usual I go in with a couple of ideas of what I want and end up putting my mortgage at risk by buying far far too much.

Read all about it on my good friend Johns blog! For pictures and eloquence.
www.heresyandheroes.com/2015/04/27/a-salute-to-salute-a-grand-day-out/

And finally the raffle, "Raffles last day" sounds like a boys book from the 80s, "Raffles goes to war"!
It's been beautifully moving to see the community come out in droves to donate and support, said it so much over the last month but you guys are fucking champions. With the penultimate count being £1,343.23 and a hundred and one of you joining in its been a resounding success. So much so that I am thinking about making it an annual thing. Just like Terrys books and our art, it's not going anywhere but hopefully we can make a difference every year :)

Still time to enter or enter again, just like buying raffle tickets you can buy more than one at
www.justgiving.com/modelsForTerry/


Thank you all!
AND JOIN ME TOMORROW FOR THE BIG FINAL DRAW OF THE NAMES!

Tuesday, March 10, 2015

The Evesor Assassin Pt:2


I've had an incredible response to this project from facebook and G+ painting communities so far! Even seen a few versions of him starting to circulate! Which is truly humbling!
Coming up to the magical 100k unique views and nearly 100 followers! So lets keep the ball rolling!

The first few layers of paint have gone onto the custom Evesor assassin!
I'm particularly proud of the syringes that have little bubbles in them.


Next up is the leather straps and red loin baubles. Lol, "loin baubles" is now in my regular vocabulary.

Happy painting!
Henry

Sunday, October 13, 2013

Howling Griffons Chapter master

Its dark! Its really dark. But that's what I was going for! Going to try for a different background on my next one. Enjoy!


Monday, September 23, 2013

Howling Griffons: Freehand banner

I have a full rundown on exactly my steps are for painting the howling griffon and how to make and paint the banner that I am currently working on, but unfortunately no time to sort and write up the tutorial on it! So here are a few pics to whet your appetite for when it appears.

Here is the banner for my howling griffons at around 90% done, needs final glazes for highlights and shadow but basically its all there, and my chapter master. I want all my models helmetless and beardy and grizzled.

C&C always welcome and appreciated!


And finally my sketches for the banner, I drew it a few times to make sure I could do it justice at such small scale. If I couldn't draw it with a pencil I knew I would struggle with a paintbrush. 


thanks for watching!
Henry

Tuesday, September 10, 2013

Tutorial: Tank Weathering Part 2

Final part of this tutorial. I hope it's helped some of you with weathering, sorry it's so long winded but if I'm not clear on something please feel free to drop a comment at the bottom there. 

On with the show! This part will explain how to get the weathering blended nicely into the tank surroundings and briefly cover how I use weathering powders, until you achieve something like this! 


1: Gloss and leaking Oil. I use Vallejo Gloss varnish for this, its exactly the same as Johnsons Klear that unfortunately no longer exists except in boxes under the stairs of professional model painters. 
Once the oil streaks we painted in from part one of this tutorial are dry (shouldnt be more than 30mins -1hour depending on how much oil paint you used.) We start to apply Gloss over the top. Ive added a little black oil paint to the burnt umber to give an engine grease look to it. 
You can see in the picture above that a milky residue is left over, don't worry about this. It soon fades and your left with the result. 


And here is the dry result. Ive not put it everywhere ive put oil paint as that would stop these parts looking so unique. My reasoning is that these sections of the track would be unscrewed to grease the tracks from the inside, thus lots of residue. surrounded by older dryer residue around it. A decent result. 

2: Tracks. This section took a lot of experimentation. So im just going to show you my final result and bullet point the steps I took to get there. 

  • Black undercoat.
  • Tin-Bitz mixed with gunmetal silver as next layer, total coverage. 
  • Wash of nuln oil GW ink. 
  • Dry brush of Gunmetal mixed with Doombull Brown. 
  • Light smattering of Light Earth weathering powder from Forgeworld mixed with water. 
  • HEAVY LAYER OF NULN OIL. 
  • Dry brush of 50/50 mix of Gunmetal and Chaos black. 
  • Apply Dry Mud weathering powder between track segments. 
and you get this.
I genuinely think you can get the same result by just doing the last 3 steps of this but maybe you wont get the depth of rust and old used tracks as is achieved here. Good luck! And please feel free to get in touch if you have a better guide than this for tracks. 

3: Weathering powders. 
This section is more about how I have come to use these amazing tools than a tutorial. Buy all of Forgeworlds weathering powders immediately. They are beautiful. Dip a frayed brush (to pick up the powder) into the pot and tap your powder onto your pallet, mix with a brush full of water and just paint it on. Once it drys it looks like this. Add more water to dilute once its on the model. The pictures below are before and after I ran a wet toothbrush over it. 

Too heavy. 

Just right!

4: Peeling paint. This bit gets technical but its worth it's weight in gold. Lifted nearly verbatim from Forgeworld masterclass book this gives a beautiful result. 

  • Undercoat black.
  • A mix of Gunmetal silver and darker silver are painted all over in a patchy way. (See image below.

  • Coat in GW purity seal. Leave to dry.
  • Coat in shop bought hairspray. Leave to dry.
  • Airbrush your chosen colour, I picked a dark yellow. Leave to dry. 
  • Dip your brush into water then lightly rub onto surface. BAM! peeling paint. 


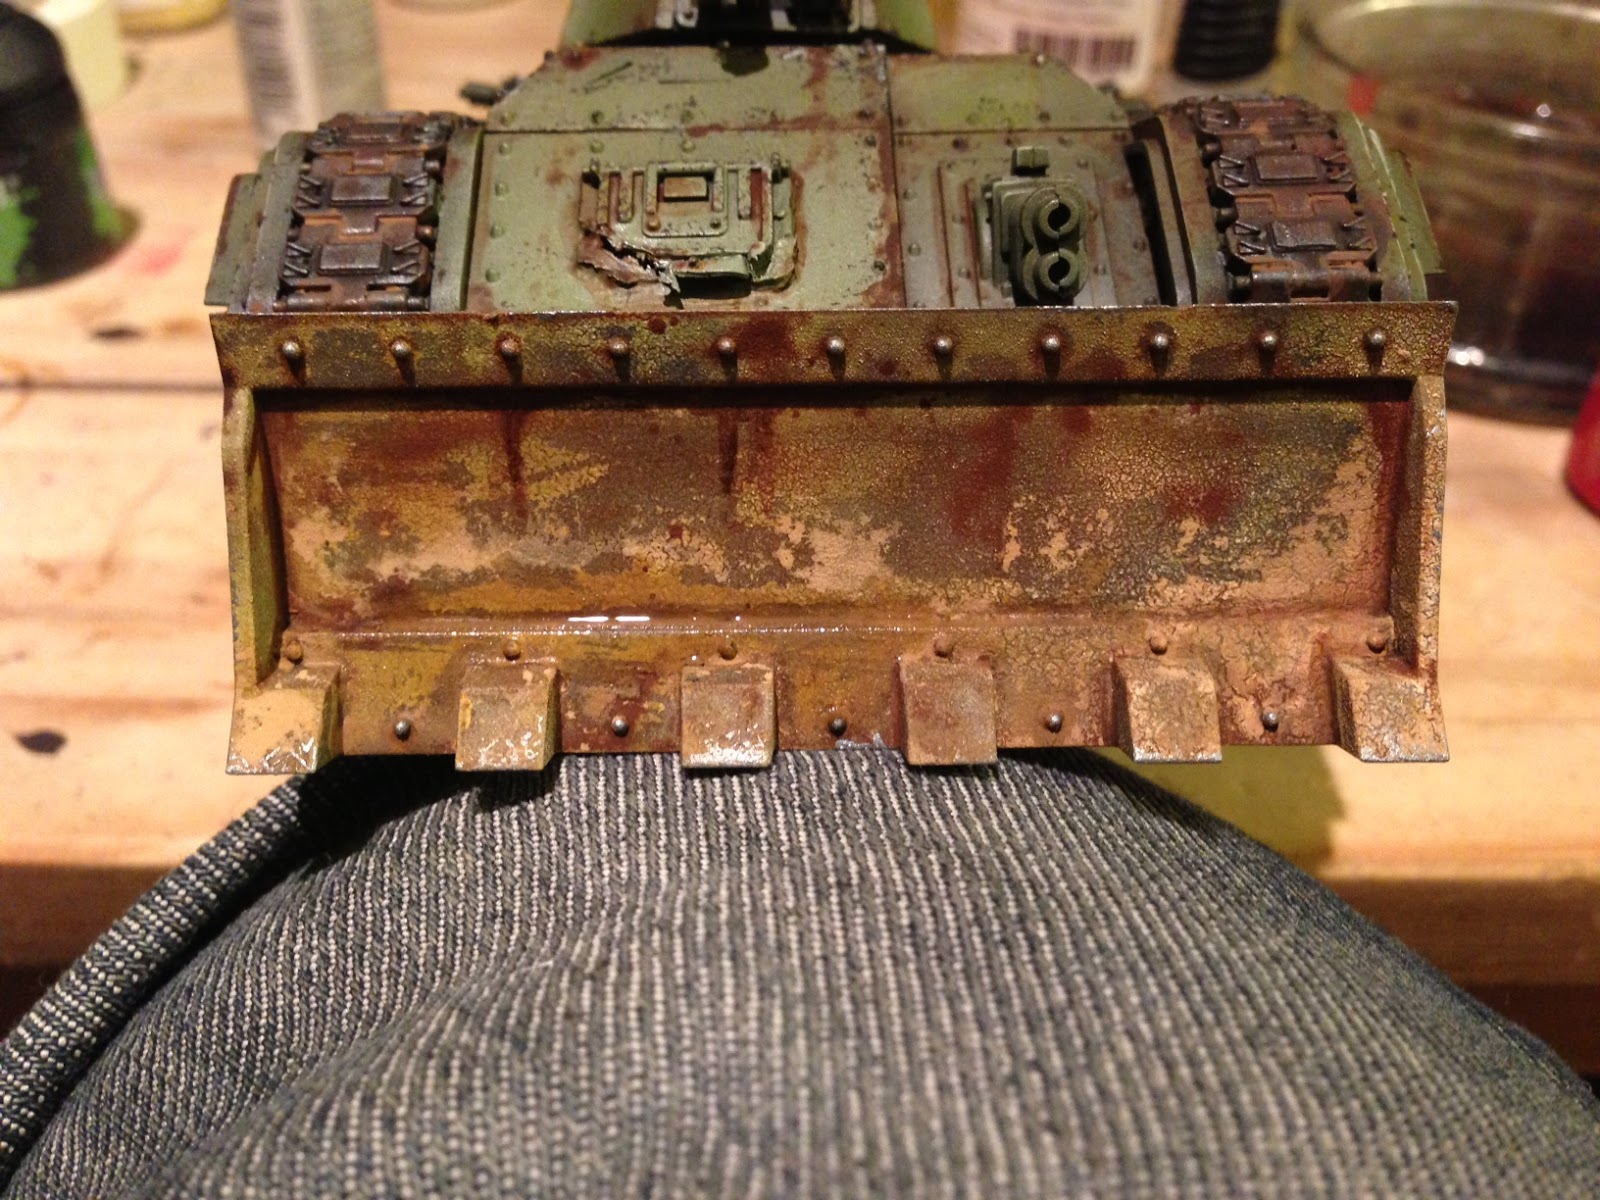
Here Ive added in a load of the techniques Ive gone over in the last few sections, lots of forgeworld weathering powder, oil leaking, and gloss varnish to give a wet mud effect. Just went to town on this beast. 


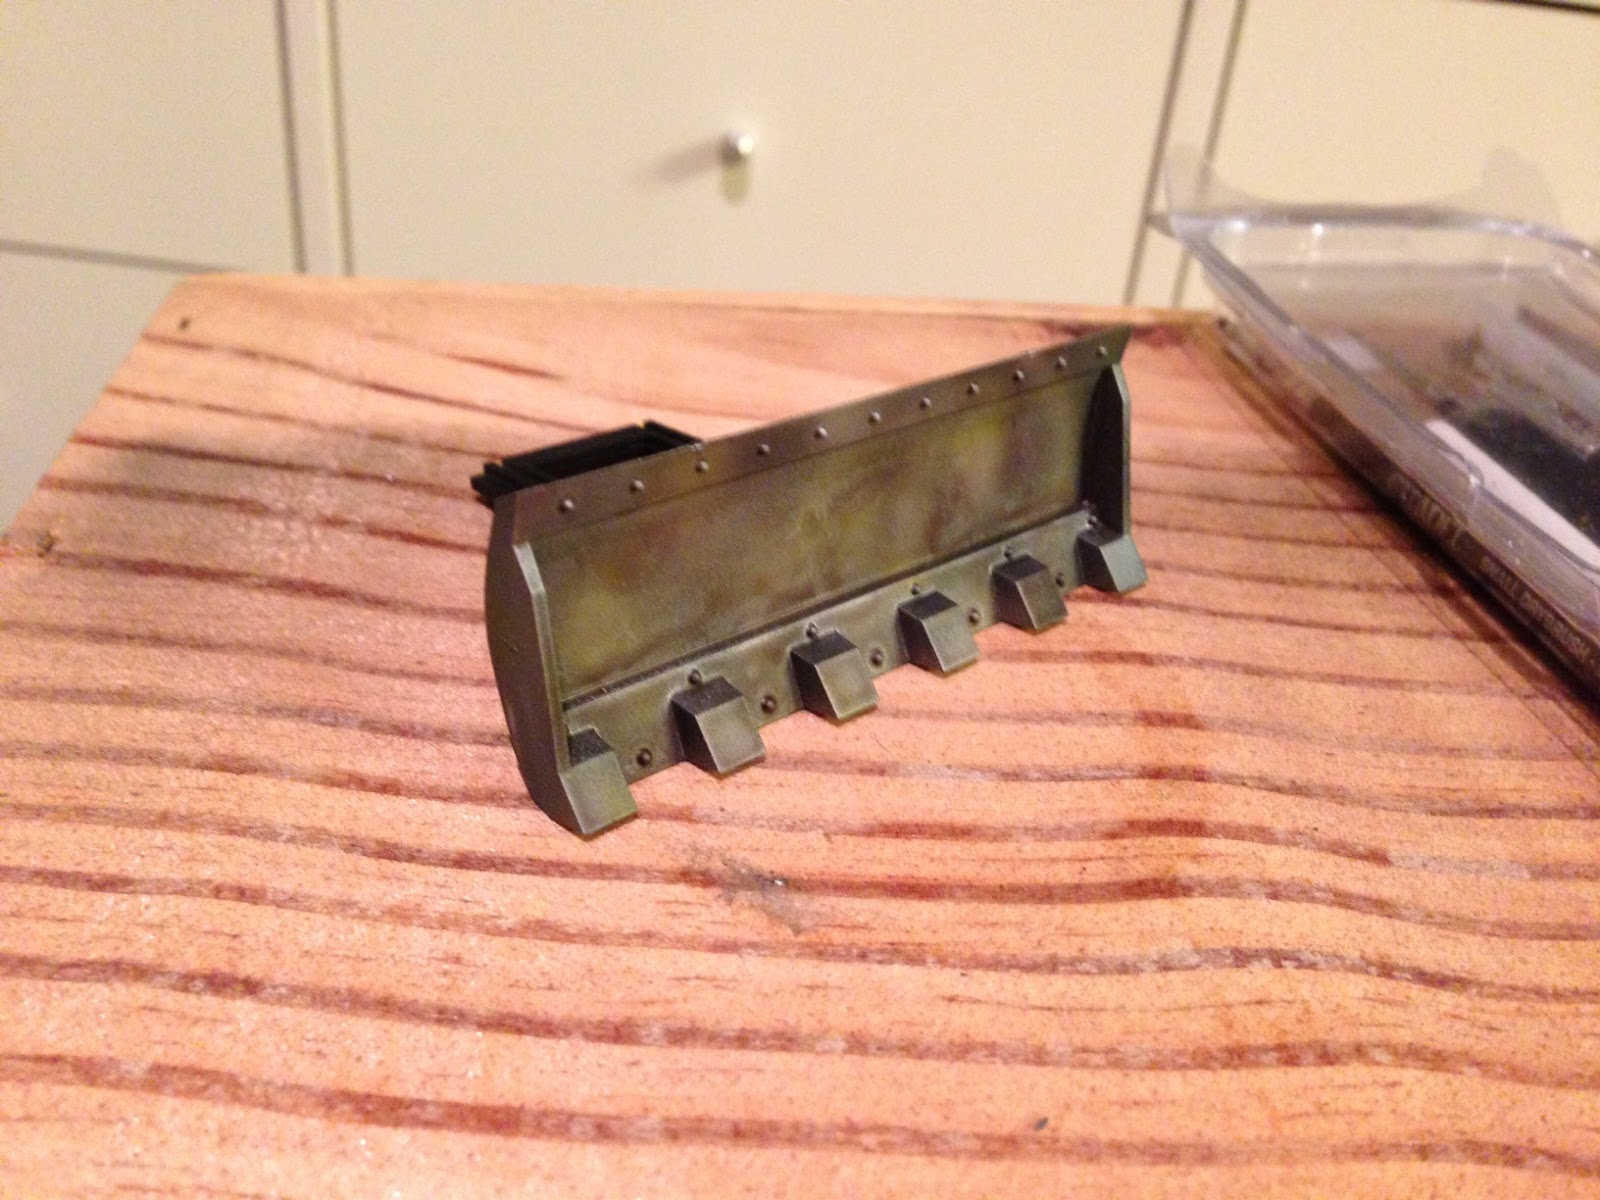
The final touch is running an HB pencil along the raised edges of the metal. This gives the tiny highlight that might have been lost in my excitement over the dozer blades. Who doesn't like massive dozer blades!?

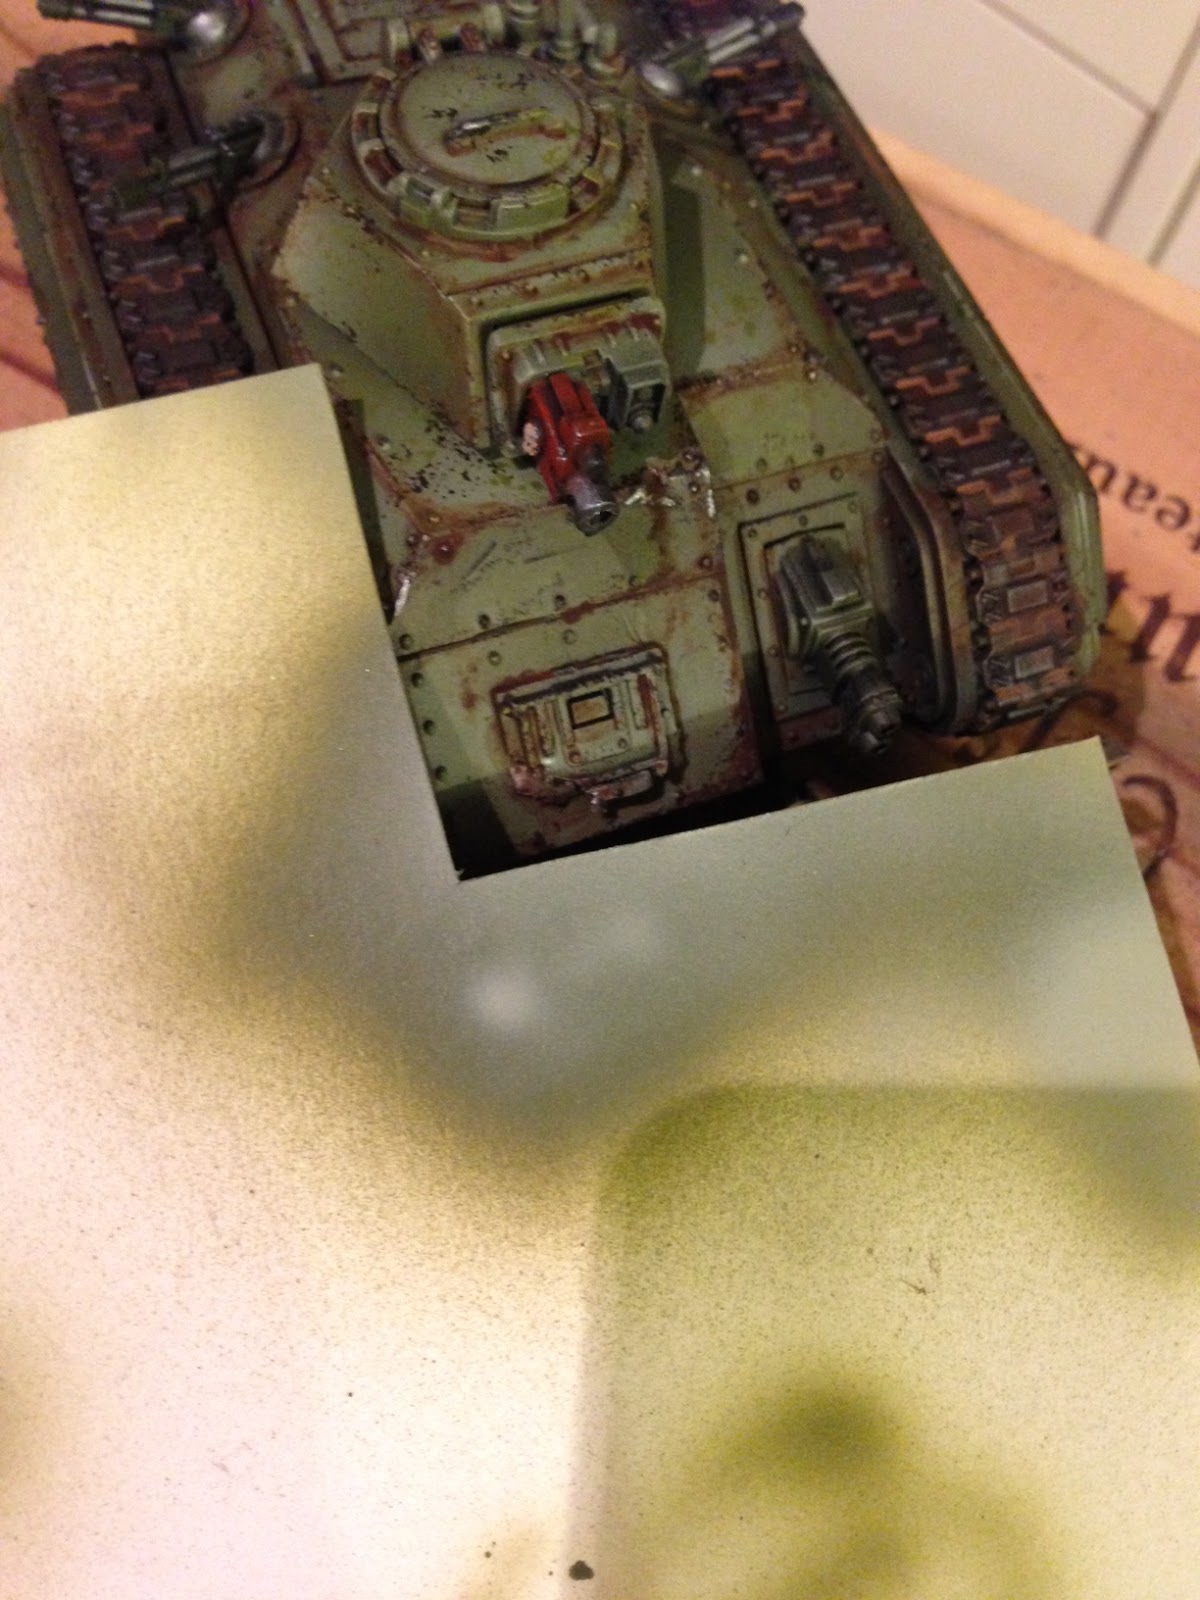
5: Finally a quick run down of  a couple of tools I've used over the last two tutorials. 

Bit of card with a corner cut off to use as a Mask for airbrushing.

Zest-it to use instead of white spirit. It's cheaper, easier to work with and it smells like oranges! I squeezed a little Burnt Umber into the bottle on the left and added a good inch of Zest-it. This is the most perfect brown wash you could ask for. It's what the dutch masters used. 

And the right 3 colours are the only ones used on the tank if you want to replicate my colour scheme. 
They are from Vallejo Model Air range. And work great straight from the bottle into an airbrush or pallet. 


Well I hope this has been helpful! 
Cheers for reading!