Showing posts with label blending. Show all posts

Tuesday, July 14, 2015

How to be a better painter.

I'm not a fantastic miniature painter. But I have gone from amateur/mediocre to good in the couple of years I've been back in the hobby. Which is a pretty steep learning curve. So heres some musings on how I reckon that s happened.

Before

After

I've painted, drawn, and sculpted my entire life, you might think this would give me a massive head start, and in some ways it has. But miniature painting it's a different ball game.. its juggling to zorbing.

As a visual effects artist my job is to observe and recreate. This is the place I feel I may have an edge. Observing and relying on reference. If I want to paint marble my first stop is www.cgtextures.com (free membership), then going out and seeing some marble. It might seem like a simple step but it's one that's forgotten more often than not.


But this is only half the battle. Knowing what your painting is fine if you can transfer that image directly to the model but having the skills behind it to translate the real world to 28mm scale is something that doesn't come easy.

I've spent a lot of money on gimmicky stuff. Fake gold leaf, brushes of every sort, stencils of every shape, convinced that this is what I need to improve. And now three years later I'm sat here with a size 1 brush and my airbrush and maybe a couple of tricks.

So my second bit of advice. Give up the size 0000000 brush. Learn to love a brush you can actually paint with. While the supermini brushes might seem like a good idea you cant "load" a brush that only has 4 bristles. Have you noticed your paint drying between the pot and the target? Want to keep painting but find you've run out of paint before the stroke has finished?

A size 1 Windsor and Newton brush has been my go to brush for the last year and I cant see that changing. From pupils in eyeballs to wet blending It will keep a sharper tip than any small brush as the bristles are angled inwards, and keep enough water and pigment held in its Well that you can complete a few strokes with it before it runs out.

It's dangerous to go alone. 
 Take these!


Thirdly, a community to turn to. Painting isn't a team event. But your not a lone wolf. Having the support of a good painting community is invaluable. My group of choice is John Ashton (from www.heresyandheroes.wordpress.com), my dog Alfie (He doesn't have a website), the G+ Warhammer 40k board and the 'eavy metal group on Facebook.
You are never too bad to post. You see so many pictures on groups saying the same thing "I know this doesn't deserve to be beside these beautifully painted figures but..." If your part of the group and are trying to improve your painting, you wont be mocked for it. There's nothing your fellow artists like more than to see people improve based off their advice...


Which brings me to my final point. Tuition. You'll probably notice that my work took quite a jump a couple of years ago, after stumbling onto www.massivevoodoo.blogspot.com
This font of knowledge is incredible. Loads of tutorials and quick and dirty tips and tricks.

But for a master-class, except no substitute, I've learned and re-learned how to paint from Painting Buddha. Ben Komets, Mati Zander, and Micheal Bartels. They are clear and concise, with explanations in a rainbow of languages. The split screen video tutorials are second to none and to get to their videos is incredibly cheap. Too cheap. Sign up immediately. If you want to be better go here.

http://www.paintingbuddha.com


I hope this little wordy geekout has helped some people out!
Happy painting!
Henry

Monday, April 27, 2015

Salute, Robots and Raffles last day!


I've lit the fuse on my Stompy War Bastards army! Sent into pacify a planet before a hive tower was built the army will be pulling itself out of the rad-wastes in the underhive! Cannot get enough of these models. And I have a lot more sitting on my desk begging for a lick of paint. Going with black, dirty white, bronze, and gold for these. Red cracked and sandy bases with bright blue OSL which should hurt the eyes if I get the contrast just so.

Salute was awesome! And as usual I go in with a couple of ideas of what I want and end up putting my mortgage at risk by buying far far too much.

Read all about it on my good friend Johns blog! For pictures and eloquence.
www.heresyandheroes.com/2015/04/27/a-salute-to-salute-a-grand-day-out/

And finally the raffle, "Raffles last day" sounds like a boys book from the 80s, "Raffles goes to war"!
It's been beautifully moving to see the community come out in droves to donate and support, said it so much over the last month but you guys are fucking champions. With the penultimate count being £1,343.23 and a hundred and one of you joining in its been a resounding success. So much so that I am thinking about making it an annual thing. Just like Terrys books and our art, it's not going anywhere but hopefully we can make a difference every year :)

Still time to enter or enter again, just like buying raffle tickets you can buy more than one at
www.justgiving.com/modelsForTerry/


Thank you all!
AND JOIN ME TOMORROW FOR THE BIG FINAL DRAW OF THE NAMES!

Tuesday, March 10, 2015

The Evesor Assassin Pt:2


I've had an incredible response to this project from facebook and G+ painting communities so far! Even seen a few versions of him starting to circulate! Which is truly humbling!
Coming up to the magical 100k unique views and nearly 100 followers! So lets keep the ball rolling!

The first few layers of paint have gone onto the custom Evesor assassin!
I'm particularly proud of the syringes that have little bubbles in them.


Next up is the leather straps and red loin baubles. Lol, "loin baubles" is now in my regular vocabulary.

Happy painting!
Henry
Tuesday, September 10, 2013

Tutorial: Tank Weathering Part 2

Final part of this tutorial. I hope it's helped some of you with weathering, sorry it's so long winded but if I'm not clear on something please feel free to drop a comment at the bottom there. 

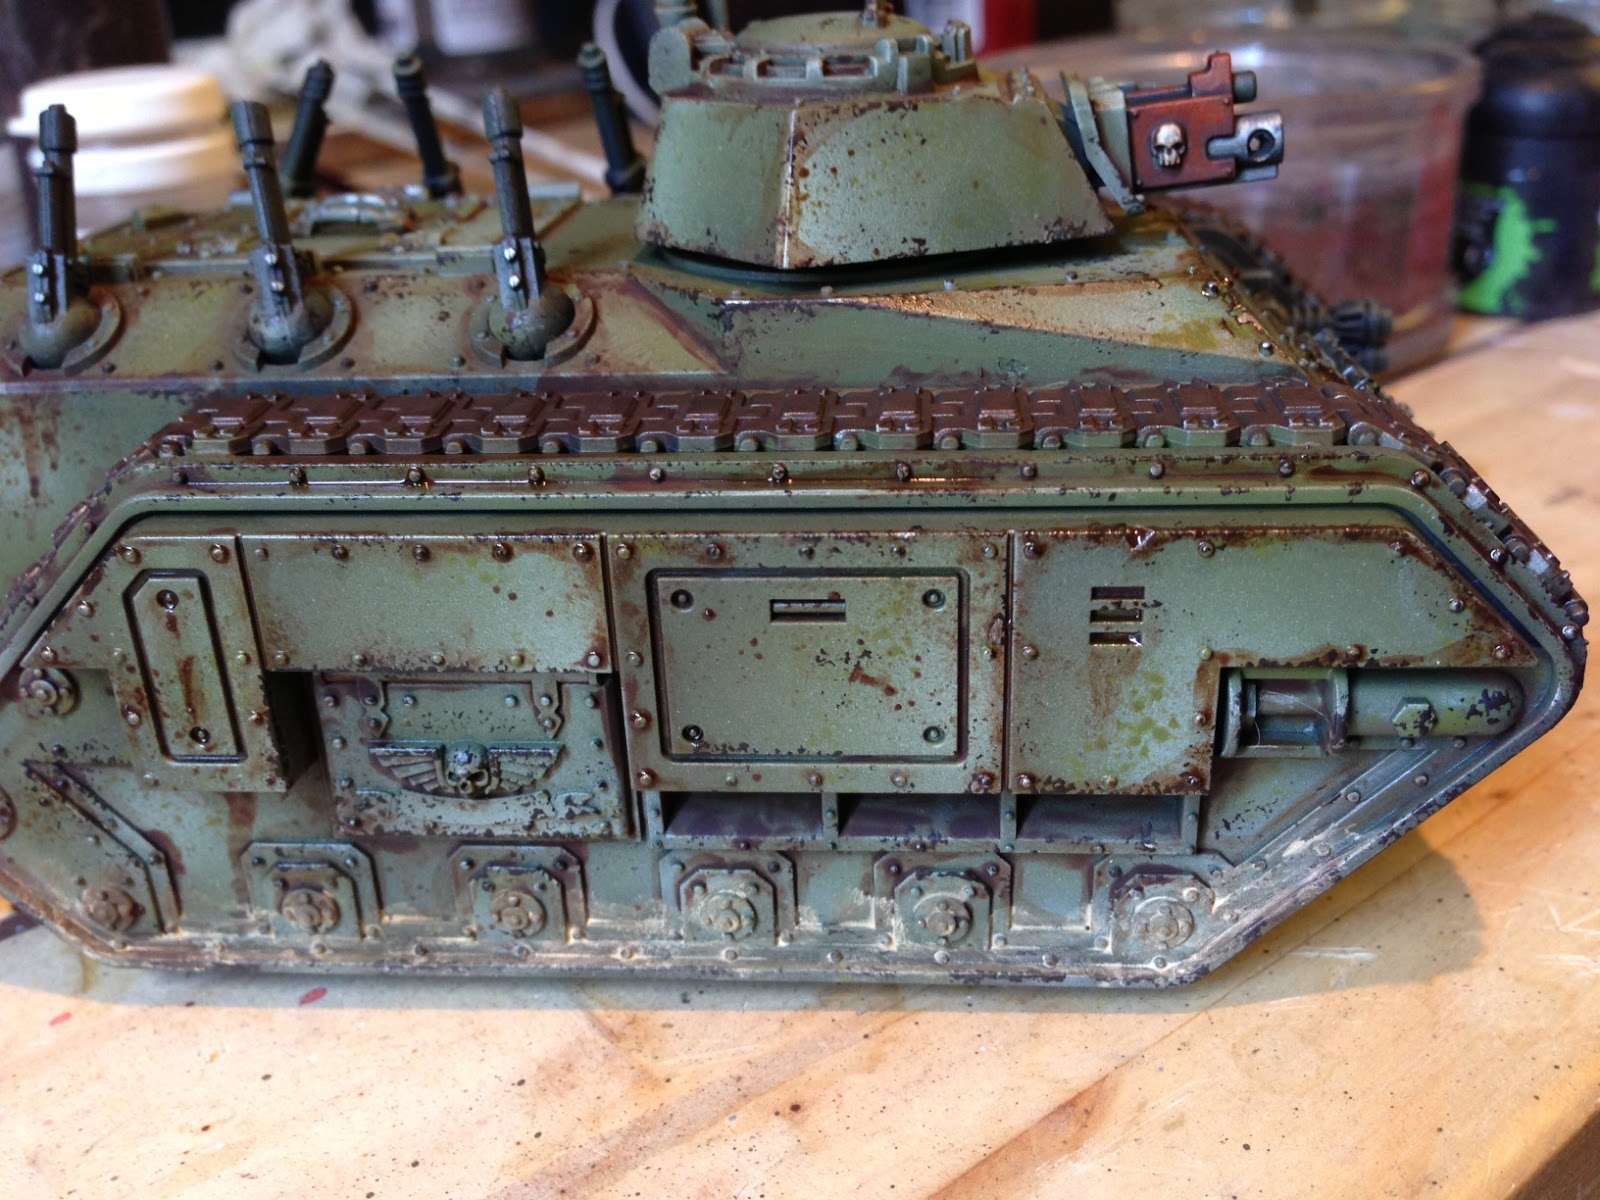
On with the show! This part will explain how to get the weathering blended nicely into the tank surroundings and briefly cover how I use weathering powders, until you achieve something like this! 


1: Gloss and leaking Oil. I use Vallejo Gloss varnish for this, its exactly the same as Johnsons Klear that unfortunately no longer exists except in boxes under the stairs of professional model painters. 
Once the oil streaks we painted in from part one of this tutorial are dry (shouldnt be more than 30mins -1hour depending on how much oil paint you used.) We start to apply Gloss over the top. Ive added a little black oil paint to the burnt umber to give an engine grease look to it. 
You can see in the picture above that a milky residue is left over, don't worry about this. It soon fades and your left with the result. 


And here is the dry result. Ive not put it everywhere ive put oil paint as that would stop these parts looking so unique. My reasoning is that these sections of the track would be unscrewed to grease the tracks from the inside, thus lots of residue. surrounded by older dryer residue around it. A decent result. 

2: Tracks. This section took a lot of experimentation. So im just going to show you my final result and bullet point the steps I took to get there. 

  • Black undercoat.
  • Tin-Bitz mixed with gunmetal silver as next layer, total coverage. 
  • Wash of nuln oil GW ink. 
  • Dry brush of Gunmetal mixed with Doombull Brown. 
  • Light smattering of Light Earth weathering powder from Forgeworld mixed with water. 
  • HEAVY LAYER OF NULN OIL. 
  • Dry brush of 50/50 mix of Gunmetal and Chaos black. 
  • Apply Dry Mud weathering powder between track segments. 
and you get this.
I genuinely think you can get the same result by just doing the last 3 steps of this but maybe you wont get the depth of rust and old used tracks as is achieved here. Good luck! And please feel free to get in touch if you have a better guide than this for tracks. 

3: Weathering powders. 
This section is more about how I have come to use these amazing tools than a tutorial. Buy all of Forgeworlds weathering powders immediately. They are beautiful. Dip a frayed brush (to pick up the powder) into the pot and tap your powder onto your pallet, mix with a brush full of water and just paint it on. Once it drys it looks like this. Add more water to dilute once its on the model. The pictures below are before and after I ran a wet toothbrush over it. 

Too heavy. 

Just right!

4: Peeling paint. This bit gets technical but its worth it's weight in gold. Lifted nearly verbatim from Forgeworld masterclass book this gives a beautiful result. 

  • Undercoat black.
  • A mix of Gunmetal silver and darker silver are painted all over in a patchy way. (See image below.

  • Coat in GW purity seal. Leave to dry.
  • Coat in shop bought hairspray. Leave to dry.
  • Airbrush your chosen colour, I picked a dark yellow. Leave to dry. 
  • Dip your brush into water then lightly rub onto surface. BAM! peeling paint. 


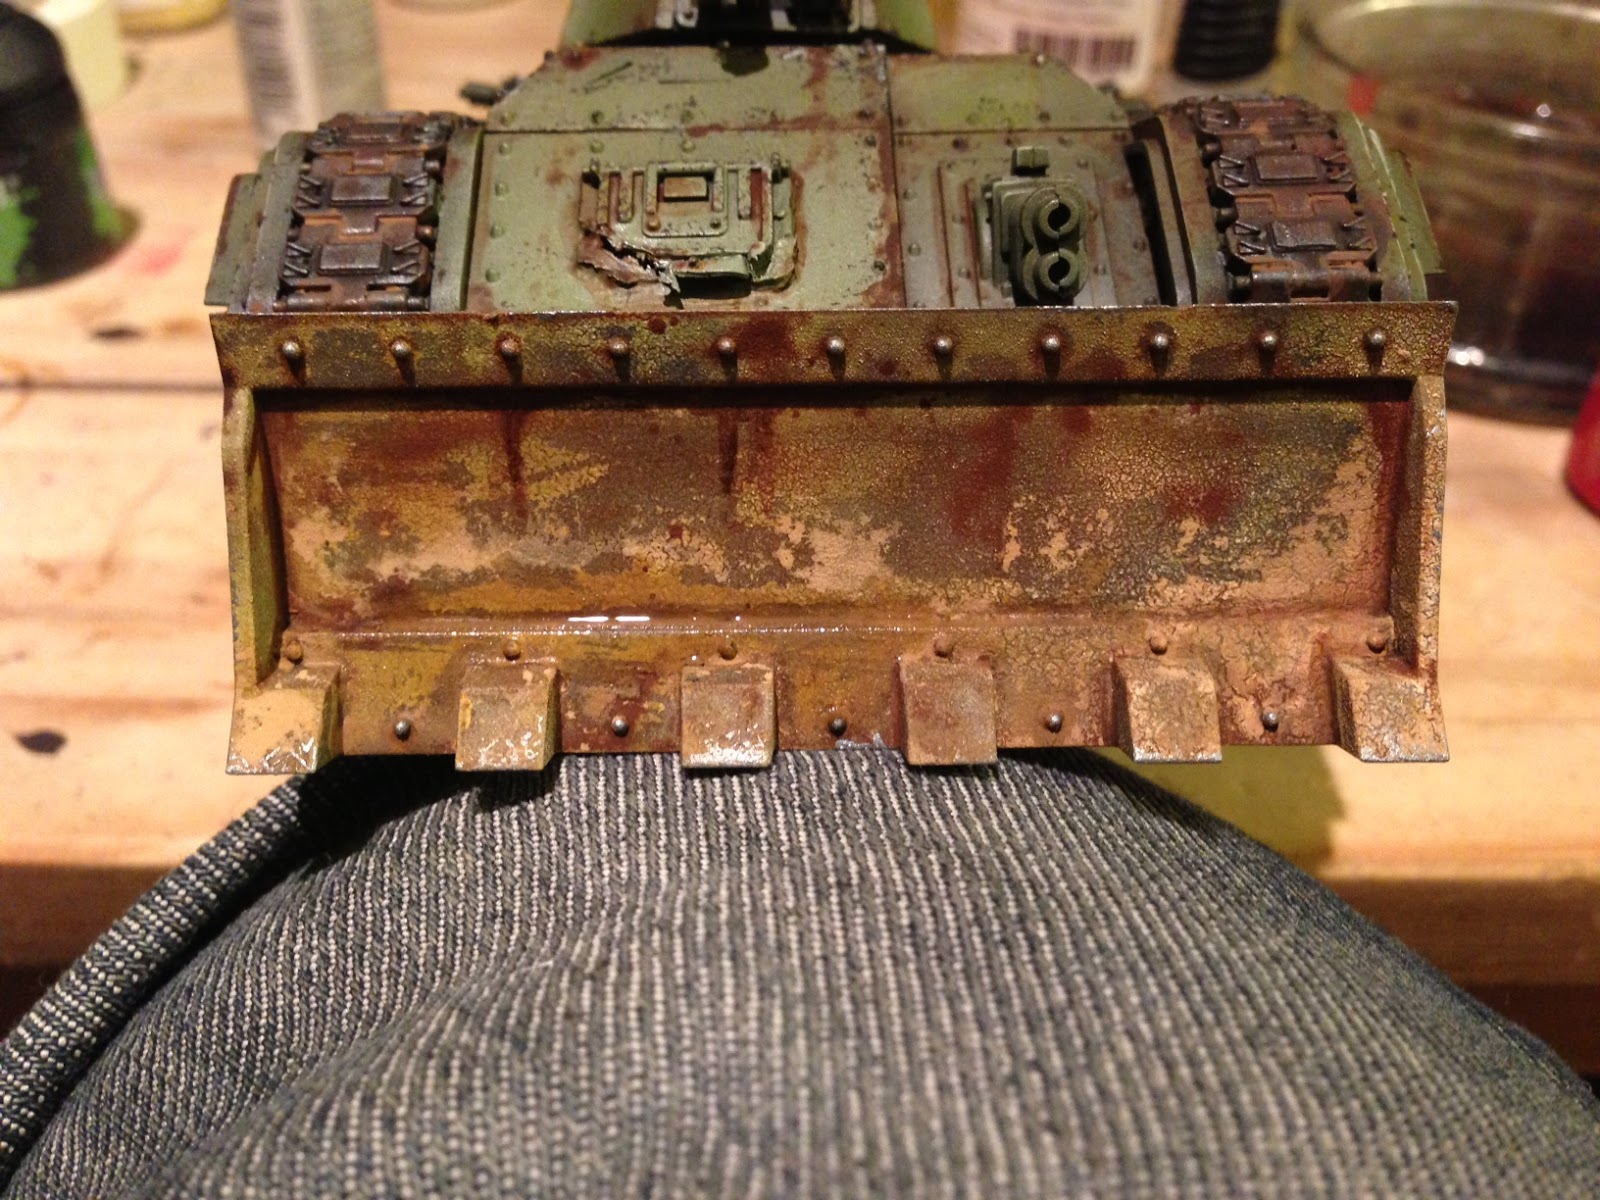
Here Ive added in a load of the techniques Ive gone over in the last few sections, lots of forgeworld weathering powder, oil leaking, and gloss varnish to give a wet mud effect. Just went to town on this beast. 


The final touch is running an HB pencil along the raised edges of the metal. This gives the tiny highlight that might have been lost in my excitement over the dozer blades. Who doesn't like massive dozer blades!?

5: Finally a quick run down of  a couple of tools I've used over the last two tutorials. 

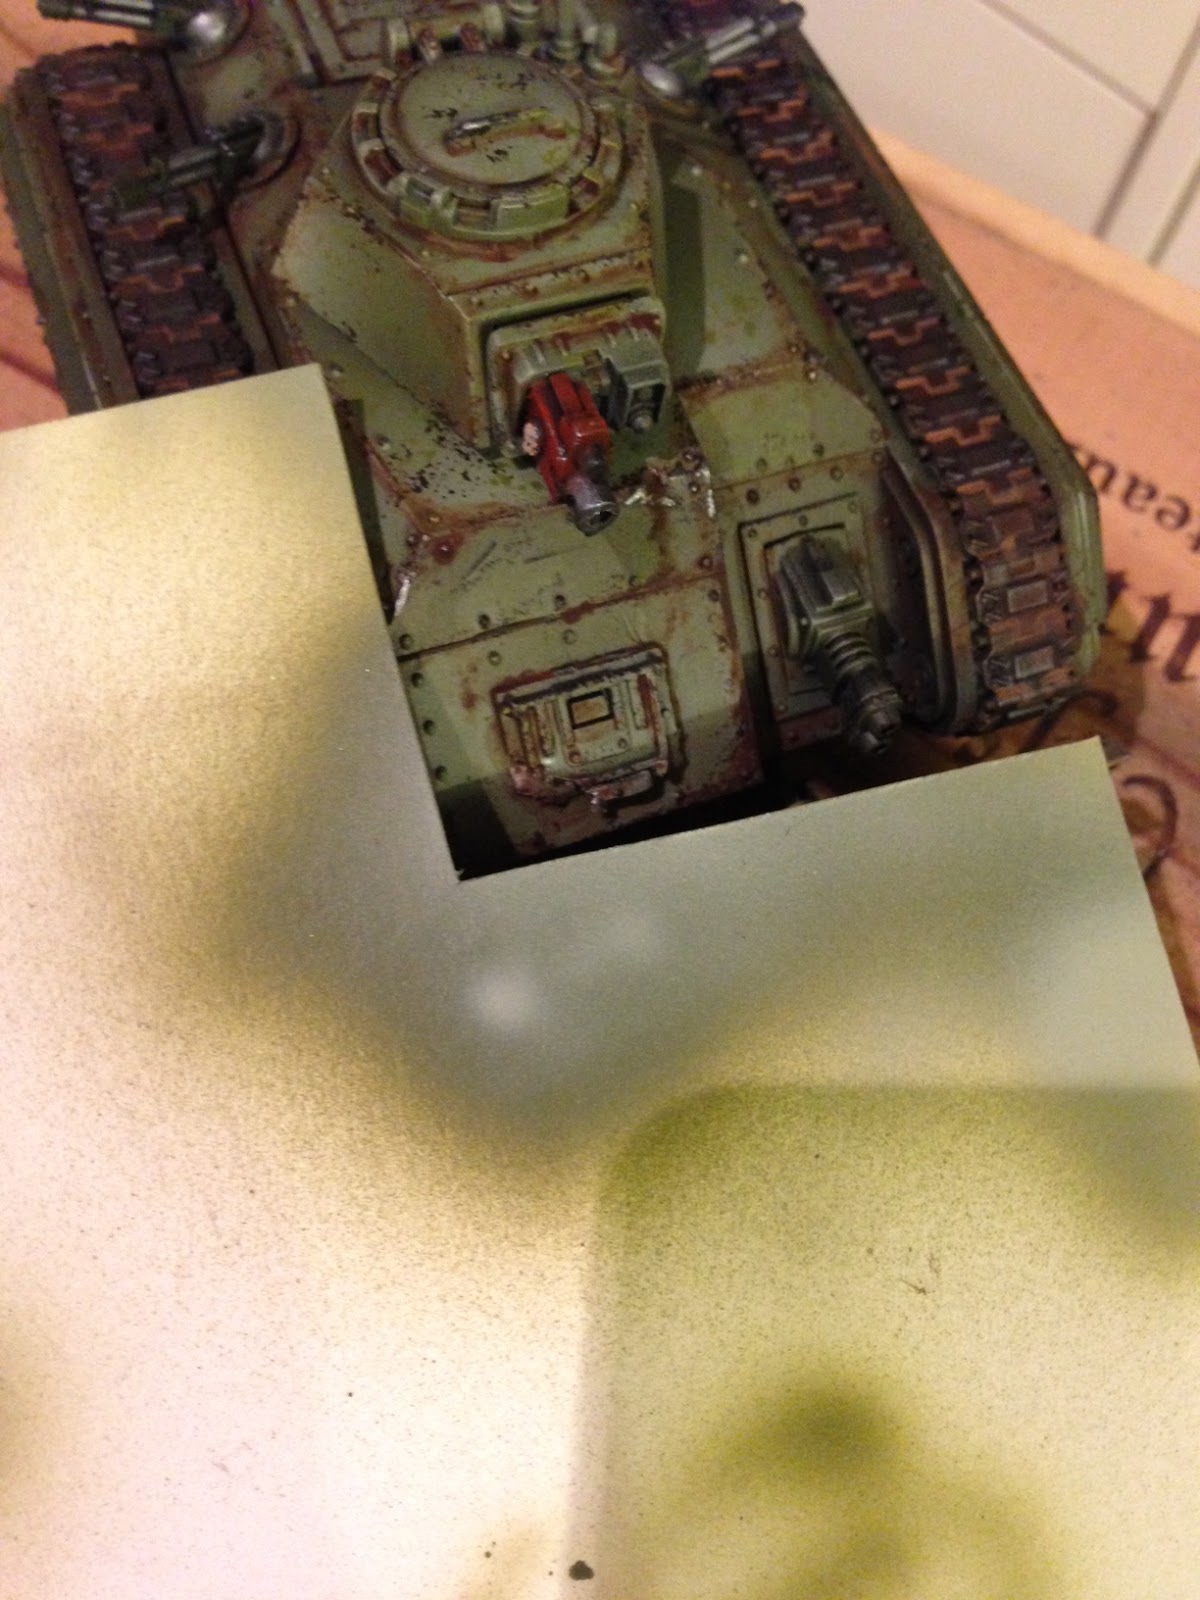
Bit of card with a corner cut off to use as a Mask for airbrushing.

Zest-it to use instead of white spirit. It's cheaper, easier to work with and it smells like oranges! I squeezed a little Burnt Umber into the bottle on the left and added a good inch of Zest-it. This is the most perfect brown wash you could ask for. It's what the dutch masters used. 

And the right 3 colours are the only ones used on the tank if you want to replicate my colour scheme. 
They are from Vallejo Model Air range. And work great straight from the bottle into an airbrush or pallet. 


Well I hope this has been helpful! 
Cheers for reading!

Monday, September 9, 2013

Tutorial: Tank Weathering Part 1

Here we are, I have been promising a weathering tutorial for a while now and here it is. There are a couple more stages to go but here are the first steps. I hope this is comprehensive enough for you guys and thank you for all your support during my Armies on Parade board and other endeavors. The techniques outlined here are from chats, Forgeworlds masterclass books, online tutorials, professional painters, my own background as a professional artist and the destruction of many models in my youth.
ENJOY!


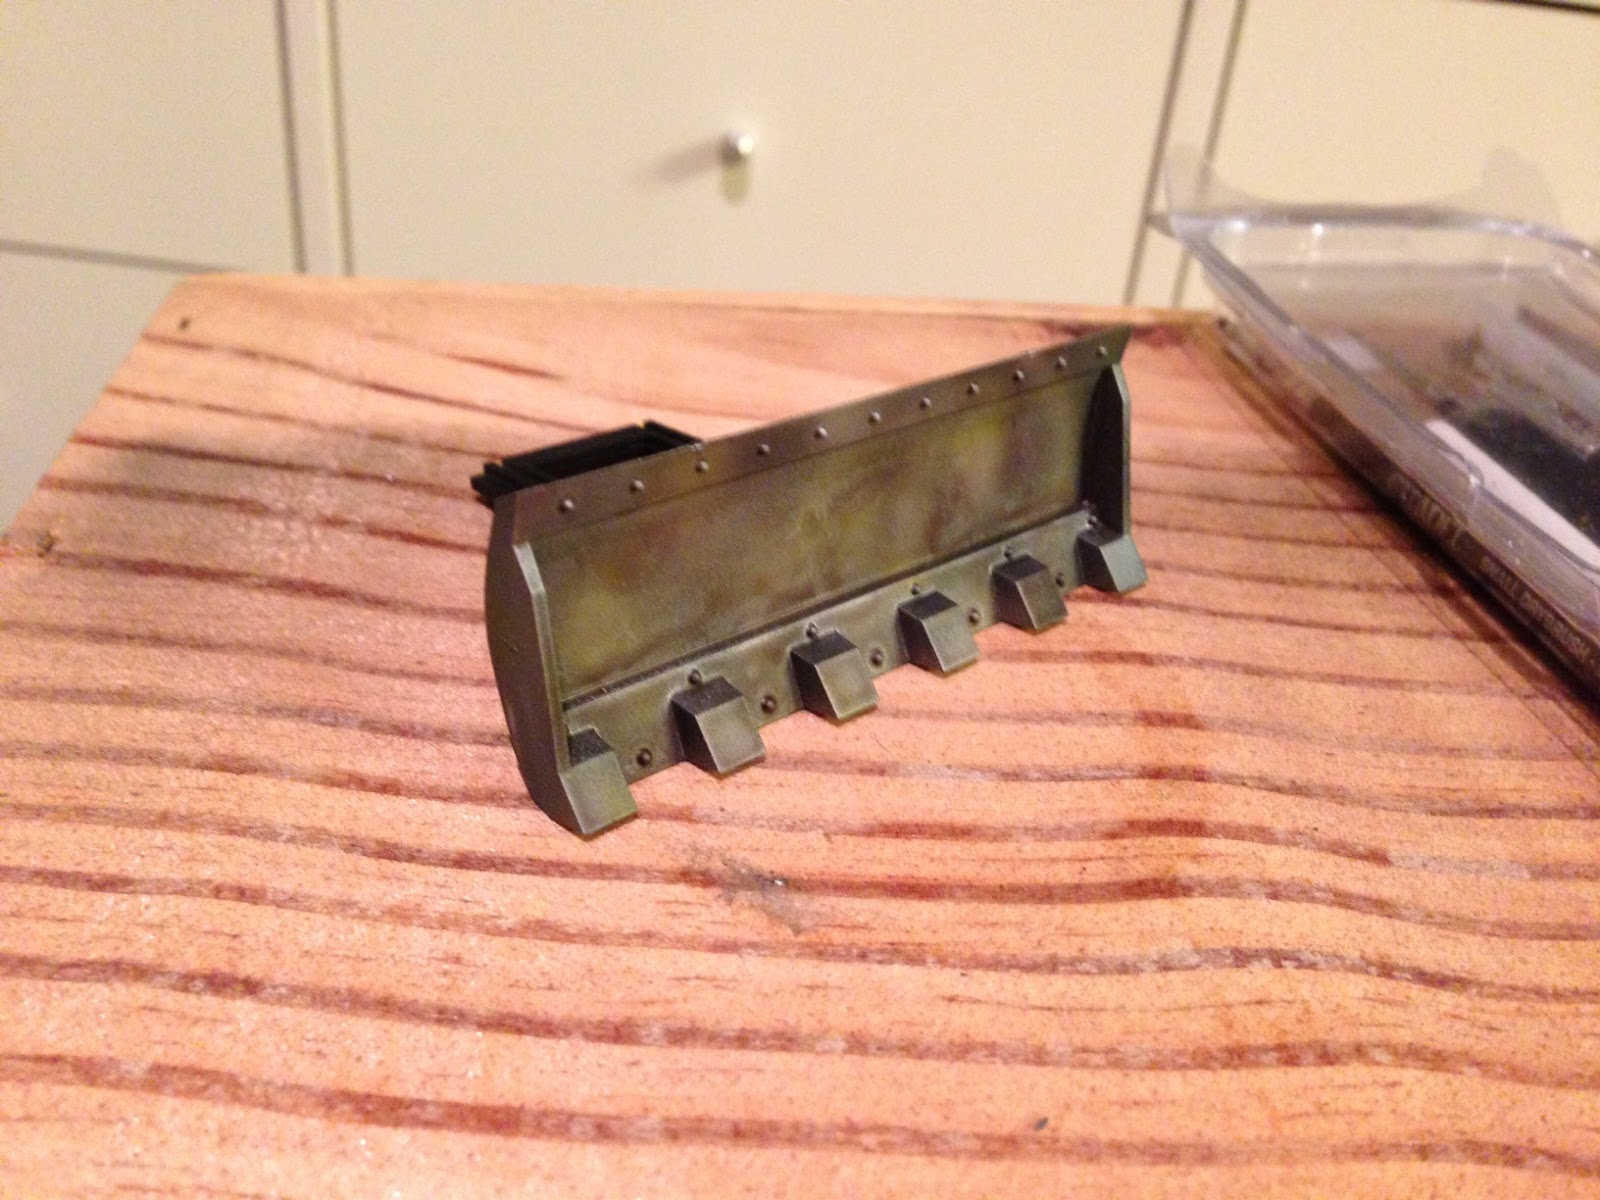
1: Gradients to hull. This first step might seem strange and will look odd until we get further along. But the basic idea behind it is to give some interest to flatter surfaces, pointing your gradients in different directions as I have done helps greatly break up the models surfaces that would otherwise seem empty. Maybe giving the impession that  a hull plate has been put on at an angle, or the light has caught a highlight. This has nothing to do with direction of light or OSL (Object Source Lighting) Just a great way to start an otherwise plain tank.

 Just three shades of green were used over a black undercoat. Applied by holding a bit of card to hold in place to mask and liberal use of the airbrush. This effect is possible to get out of a dry brush but its a hassle. I don't see why this effect couldn't be done using the GW airgun.


2: Edge Highlighting. Right this step is a bit of a bugger and again it might seem unnecessary but trust me. it creates a good result. Apply a bit of your chosen colour (the lightest you have painted the gradient with) to your brush and rub it all off on your hand/pallet so you are left with a tiny tiny amount of nearly dry paint still on the brush. Then drag your brush along the corners and edges. This doesn't need to be perfect, you aren't "edge highlighting" power armor and need to blend it or anything. This can be rough. Like the tanks been used and knocked about a bit and the top layer of paint has scraped away. 


This also works to tie the model together. 


3: Sponges. Love them. Learn to use them and use them all the time. If you have bought a model from GW or forgeworld you have sponges laying around. If you wash you have sponges. Sponges cost 50p from most shops. Use sponges...
I use a 50/50 mix of chaos black and doombull brown to make a deep dark rusty black colour to dab my sponge in. Don't press it straight onto the model! Test it on your hand or table or pallet before putting it on the model or you may end up with a massive chunk of black dripping down and ruining all your hard work. Be gentle and learn to love the sponge. 


Less is more when it comes to sponging. Its tempting to go crazy and sponge the crap out of something.  With this tank it had to look battered and well used but not destroyed. So little dabs around the raised areas and between plates, with only a couple of areas receiving larger splotches where perhaps the crew would swing themselves up into the cabin. Think about how this tank would be used. It makes the process bearable haha. and if you dab on silver or gunmetals be very very sparing. This denotes where the paint is all the way down to the bare metal. With these heavy tanks doing that would be hugely difficult. 


4: Drips and leaks. This can be done with GW's Agrax Earthshade at £2.50 for a tiny pot. But for the best results get a tube of burnt umber oil paint for £1.50 and some white spirit for £1 and make yourself a lifetimes supply of perfect wash that GW cant touch for quality or price. 


This bit isnt an art form. Run your wash of choice into the gaps and do a few layers of the wash to build up drips running down. Quick and beautiful result. Dont let people tell you that it doesn't dry because they dont know what they are talking about. A thinned layer like this will dry in about 5mins. Like most inks. Obviously the less you thin the longer it will take to dry. 


You might also notice I've washed the edges with a bit of this wash mix too, again, to unify the painting. Bringing it together and making the tank look like a thing that belongs. 


I hope this has been helpful! And join me next time for part 2. Weathering powders, gloss, chipping and how not to destroy things with weathering powders.

Saturday, June 8, 2013

Armies on parade: ariel reinforcement

The sunshark bomber and a devil fish have joined the ranks to fill the gaps in my armies on parade board! Beautiful models. Easy to put together and a pleasure to airbrush. You might notice the drones on the sunshark are dark grey and orange. To make them pop a little and give them a more experimental look. They will have minimal damage so they look freshly installed. And after my tau aircast arrive drone Forgeworld my plan will slowly start to come together! Alsomagnetised  the drones. Don't want them spinning off and embarrassing me. 


Wednesday, June 5, 2013

Armies on parade: I've been busy!

Heat damaged Gatling gun, objectsource  lighting, oil washes and miliput sculpture. Phew. A productive day!! Hoping it reads properly! 
Here's a bunch of pictures. 


Tuesday, February 12, 2013

Eleanor finished!

Well I wasn't expecting it to happen so fast. Totally zoned out and finished my HQ! There is probably room for improvement on this but its beyond my abilities at the moment. So without further ado, here she is! I've even made an effort with the pictures, you lucky people!