Showing posts with label oils. Show all posts

Monday, April 27, 2015

Salute, Robots and Raffles last day!


I've lit the fuse on my Stompy War Bastards army! Sent into pacify a planet before a hive tower was built the army will be pulling itself out of the rad-wastes in the underhive! Cannot get enough of these models. And I have a lot more sitting on my desk begging for a lick of paint. Going with black, dirty white, bronze, and gold for these. Red cracked and sandy bases with bright blue OSL which should hurt the eyes if I get the contrast just so.

Salute was awesome! And as usual I go in with a couple of ideas of what I want and end up putting my mortgage at risk by buying far far too much.

Read all about it on my good friend Johns blog! For pictures and eloquence.
www.heresyandheroes.com/2015/04/27/a-salute-to-salute-a-grand-day-out/

And finally the raffle, "Raffles last day" sounds like a boys book from the 80s, "Raffles goes to war"!
It's been beautifully moving to see the community come out in droves to donate and support, said it so much over the last month but you guys are fucking champions. With the penultimate count being £1,343.23 and a hundred and one of you joining in its been a resounding success. So much so that I am thinking about making it an annual thing. Just like Terrys books and our art, it's not going anywhere but hopefully we can make a difference every year :)

Still time to enter or enter again, just like buying raffle tickets you can buy more than one at
www.justgiving.com/modelsForTerry/


Thank you all!
AND JOIN ME TOMORROW FOR THE BIG FINAL DRAW OF THE NAMES!

Thursday, May 22, 2014

Tutorial: "GOOOOOLD" part I

I've got gold to paint. A whole lot of gold to paint. And I intend to be good at it. Weather its faking it with NMM or using the good stuff with RMM (real metallic metals.) I feel this is something that can set a model apart from others.

So I've decided to approach it in the way I would approach any digital or flat painting but research and development.

So what do we paint in gold and why? Shiny stuff. Right. Things we want to look important. Damn right. Because gold (In our little world) usually symbolizes the bad ass king with a big ass sword. So let look at the gold we want to use.

Take this mental son of a bitch Charles-Andre van Loo.
(Download this picture, put it on your iphone, print it out. Its a beauty)
 
 I'll be using this little patch of his work a lot when it comes to putting paint to mini. Knowing where the light bends and what looks right is vital to a solid gold or metal. Cor. What a beauty.

 (Which is why the Queen of France in this picture must have been pissed. "Look at that god damn table shining like a motherfucker. You haven't even got my eyes straight!")

 There is a downside to trying to copy this palette however. Just look at how complex his golds are.
 
(DAMMIT LOO! Now that's a spectrum. Maybe he did it on purpose to stop people looking at the face of the queen of France.)


Condensing that down to 28mm scale would ruin most of our days. But Whats going on there that could help. 
The brightest colour is no where near white. Maximum is a beige. The darkest colour is mega dark red?! There is green in it. 


So maybe something a little simpler. Another master of metals is Charles Le Brun. 


Look at this cheeky arse bandits painting. Two types of gold on display here. The celestial pure gold, and the rich earthy gold of the frame. Probably a message there somewhere, sure as hell isn't share the wealth anyway. Look at this guy. Does a perfect face at the top and paints a guy that looks like a bad Michael Cera fan art in the main bit. What the hell dude. 

 I love the look of this gold. Im going to copy the hell out of it.


And low and behold. There is bugger all in it! Its all about the placement. Few colours and the right strokes. 


Drink hearty lads! for tonight we paint in hell!! (In part II)

Monday, September 23, 2013

Howling Griffons: Freehand banner

I have a full rundown on exactly my steps are for painting the howling griffon and how to make and paint the banner that I am currently working on, but unfortunately no time to sort and write up the tutorial on it! So here are a few pics to whet your appetite for when it appears.

Here is the banner for my howling griffons at around 90% done, needs final glazes for highlights and shadow but basically its all there, and my chapter master. I want all my models helmetless and beardy and grizzled.

C&C always welcome and appreciated!


And finally my sketches for the banner, I drew it a few times to make sure I could do it justice at such small scale. If I couldn't draw it with a pencil I knew I would struggle with a paintbrush. 


thanks for watching!
Henry

Monday, September 9, 2013

Tutorial: Tank Weathering Part 1

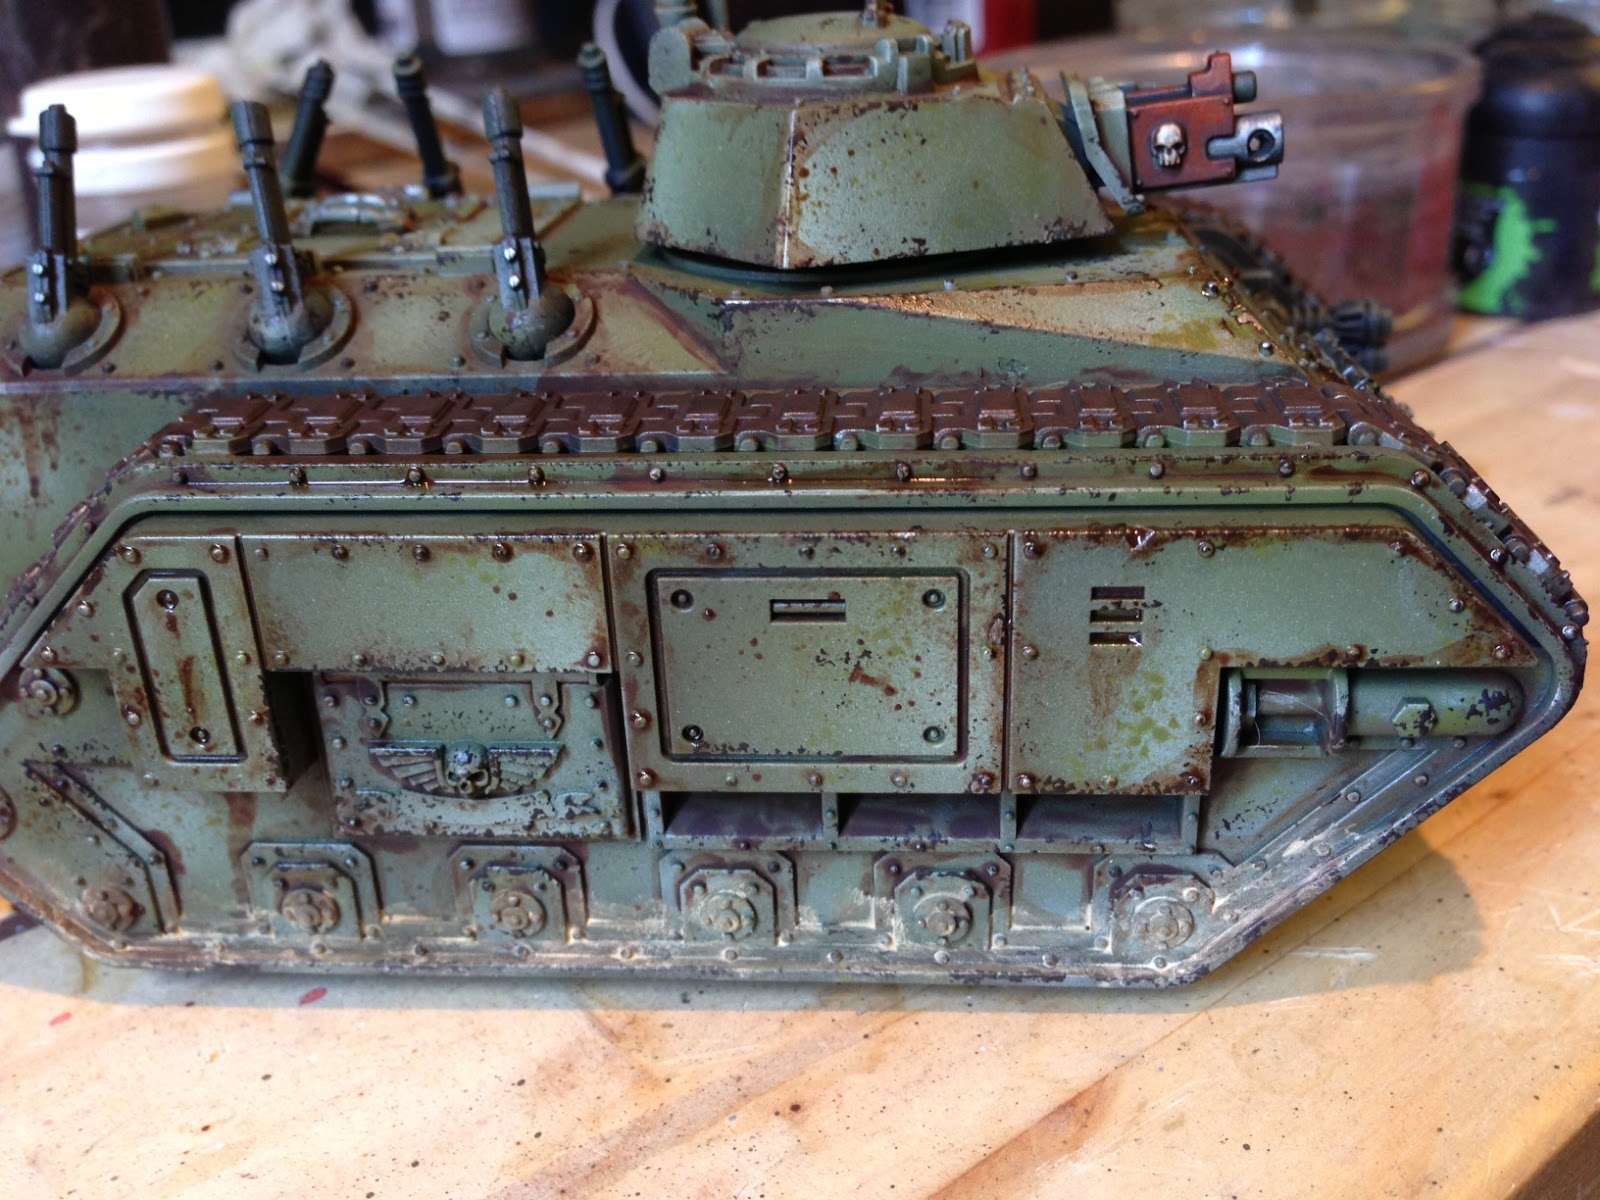
Here we are, I have been promising a weathering tutorial for a while now and here it is. There are a couple more stages to go but here are the first steps. I hope this is comprehensive enough for you guys and thank you for all your support during my Armies on Parade board and other endeavors. The techniques outlined here are from chats, Forgeworlds masterclass books, online tutorials, professional painters, my own background as a professional artist and the destruction of many models in my youth.
ENJOY!


1: Gradients to hull. This first step might seem strange and will look odd until we get further along. But the basic idea behind it is to give some interest to flatter surfaces, pointing your gradients in different directions as I have done helps greatly break up the models surfaces that would otherwise seem empty. Maybe giving the impession that  a hull plate has been put on at an angle, or the light has caught a highlight. This has nothing to do with direction of light or OSL (Object Source Lighting) Just a great way to start an otherwise plain tank.

 Just three shades of green were used over a black undercoat. Applied by holding a bit of card to hold in place to mask and liberal use of the airbrush. This effect is possible to get out of a dry brush but its a hassle. I don't see why this effect couldn't be done using the GW airgun.


2: Edge Highlighting. Right this step is a bit of a bugger and again it might seem unnecessary but trust me. it creates a good result. Apply a bit of your chosen colour (the lightest you have painted the gradient with) to your brush and rub it all off on your hand/pallet so you are left with a tiny tiny amount of nearly dry paint still on the brush. Then drag your brush along the corners and edges. This doesn't need to be perfect, you aren't "edge highlighting" power armor and need to blend it or anything. This can be rough. Like the tanks been used and knocked about a bit and the top layer of paint has scraped away. 


This also works to tie the model together. 


3: Sponges. Love them. Learn to use them and use them all the time. If you have bought a model from GW or forgeworld you have sponges laying around. If you wash you have sponges. Sponges cost 50p from most shops. Use sponges...
I use a 50/50 mix of chaos black and doombull brown to make a deep dark rusty black colour to dab my sponge in. Don't press it straight onto the model! Test it on your hand or table or pallet before putting it on the model or you may end up with a massive chunk of black dripping down and ruining all your hard work. Be gentle and learn to love the sponge. 


Less is more when it comes to sponging. Its tempting to go crazy and sponge the crap out of something.  With this tank it had to look battered and well used but not destroyed. So little dabs around the raised areas and between plates, with only a couple of areas receiving larger splotches where perhaps the crew would swing themselves up into the cabin. Think about how this tank would be used. It makes the process bearable haha. and if you dab on silver or gunmetals be very very sparing. This denotes where the paint is all the way down to the bare metal. With these heavy tanks doing that would be hugely difficult. 


4: Drips and leaks. This can be done with GW's Agrax Earthshade at £2.50 for a tiny pot. But for the best results get a tube of burnt umber oil paint for £1.50 and some white spirit for £1 and make yourself a lifetimes supply of perfect wash that GW cant touch for quality or price. 


This bit isnt an art form. Run your wash of choice into the gaps and do a few layers of the wash to build up drips running down. Quick and beautiful result. Dont let people tell you that it doesn't dry because they dont know what they are talking about. A thinned layer like this will dry in about 5mins. Like most inks. Obviously the less you thin the longer it will take to dry. 


You might also notice I've washed the edges with a bit of this wash mix too, again, to unify the painting. Bringing it together and making the tank look like a thing that belongs. 


I hope this has been helpful! And join me next time for part 2. Weathering powders, gloss, chipping and how not to destroy things with weathering powders.

Tuesday, July 2, 2013

Armies on parade: progress

A very quick update with the power of the SLR.

Lets kick things off with an action shot of my Devilfish. Furnished with scout drone poking its head out the top, like the badass sneaky minigun robot death drone that he is. I will be painting my whole army to this standard before taking it further. Oooooh yes. a lot further. This way I can keep the standard consistent throughout the board, and my recipe doesn't need to change. When it comes to phase two of my masterplan you will see changes.


Next is my beat up DeathKorps executioner. poor little bugger, hes had a rough day of it. Obviously heavily beaten down during the first phases of my imaginary war then finished off by the crazy remnants of the blue hippies that are the Tau. You can see the exit holes of the final shots in the bottom right of the track and just below the main turret. Considering wire wool smoke but that might look a little corny and distract from my Tau. Which i might have to do if they dont look good.

As for the rest of the pictures, you have phase one of my hammerhead and my commander.
ENJOY!